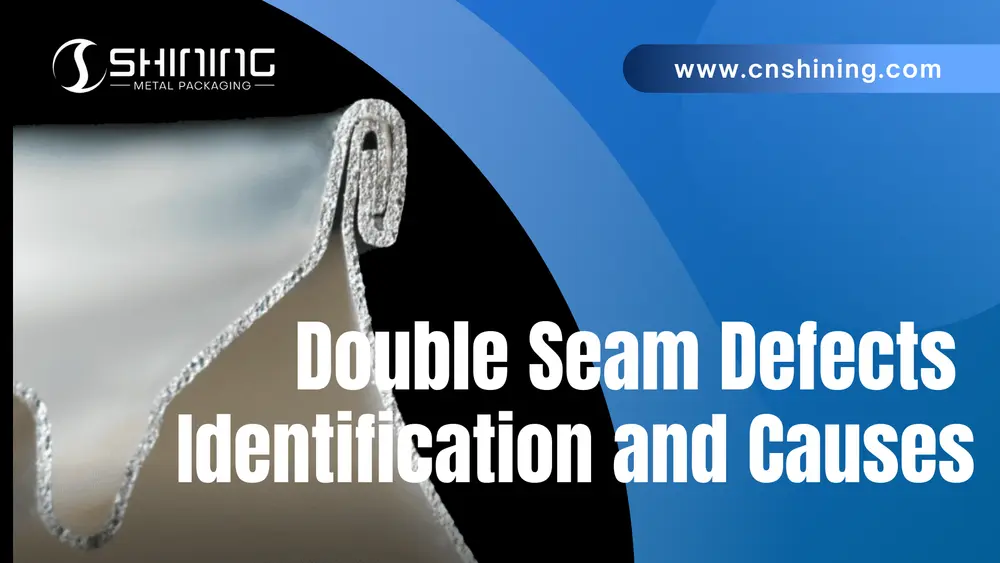
Double Seam Defects: Identification and Root Causes
In food and beverage packaging, seam integrity is the final barrier between the product and the external environment. A properly formed double seam ensures hermetic sealing, maintains internal pressure, and protects against microbial contamination.
However, Double Seam Defects remain one of the most critical quality risks in can manufacturing. Even minor irregularities in the seam structure can compromise overlap, weaken mechanical strength, or create leakage paths.
This guide focuses on identifying major defect types, understanding their root causes, and outlining practical prevention principles relevant to engineers, quality inspectors, and procurement teams.
Learn the basics: Understanding the Double Seaming Process in Can Manufacturing.
Common Double Seam Defects
To simplify evaluation, double seam defects can be analyzed through three key aspects:
- Characteristic — What the defect looks like
- Cause — Why the defect occurs
- Consequence — Why the defect is critical
1. False Seam
Characteristic: The seam appears normal externally, but the cover hook and body hook are not interlocked. They are folded against each other without proper engagement.
Cause:
- Misalignment between can body and end
- Insufficient first operation pressure
- Worn seaming rolls or chuck
Consequence: High risk of leakage and contamination. False seams often cannot be detected visually without seam teardown inspection.

2. Droop
Characteristic: A smooth projection of the seam extending below the normal bottom seam profile. The edge may appear scalloped.
Cause:
- Excessive metal feed into the seam
- Improper roll adjustment
- Mismatch between body flange and end curl
Consequence: Weak structural points may form and rupture under internal pressure or thermal stress.

3. Vee
Characteristic: A V-shaped opening or sharp projection visible along the seam edge.
Cause:
- Incorrect roll alignment
- Uneven seaming pressure
- Damaged tooling
Consequence: Localized loss of overlap and increased risk of leakage.

4. Cutover (Sharp Seam Fracture)
Characteristic: Metal fracture occurring at the upper inside edge of the seam, often leaving a sharp exposed edge.
Cause:
- Excessively tight second operation
- Overly hard or worn rolls
- Excess sealing compound
Consequence: Immediate leakage risk and potential damage to internal coating layers.

5. Knocked Down Flange
Characteristic: The body flange becomes bent before seaming, preventing proper hook formation in a localized area.
Cause:
- Handling damage prior to seaming
- Misfeed or mechanical impact during transfer
Consequence: Incomplete hook formation and loss of seam structural strength.

6. Hook Length Defects (Long / Short Hooks)
Long Body or Cover Hook
Characteristic: Hook length approaches or exceeds specification.
Cause:
- Improper roll setup
- Incorrect chuck height
Consequence: Unbalanced seam structure and possible seam bump formation.


Short Body or Cover Hook
Characteristic: Hook length falls below minimum specification.
Cause:
- Insufficient tuck during first operation
- Tight first operation settings
- Harder-than-expected material
Consequence: Reduced overlap and compromised seal integrity.


7. Loose First Operation Seam
Characteristic: Insufficient formation during the first operation with inadequate tuck of the cover curl.
Cause:
- Low roll pressure
- Worn first operation roll
Consequence: Insufficient overlap in the finished seam.

(Also known as a variant of false seam or loose hook formation.)
8. Tight First Operation Seam
Characteristic: Flattened bottom of the first operation seam, sometimes accompanied by reverse wrinkles.
Cause: Excessive first operation pressure.
Consequence: Material stress that may lead to cutovers or fractured seams.

9. Seam Bump
Characteristic: Localized increase in seam thickness, typically greater than 0.004 inches.
Cause:
- Long body hook
- Roll profile irregularities
- Excessive metal displacement
Consequence: Stress concentration and potential seam distortion during thermal processing.

10. Sprung Seam
Characteristic: The seam visibly pulls away from the body wall.
Cause:
- Excessive lifter pressure
- Over-tight second operation
- High internal pressure
Consequence: Complete loss of hermetic seal.

Reducing Double Seam Defects
Preventing seam defects relies on disciplined process control rather than complex equipment. Several core practices significantly reduce risk.
1. Maintain Tooling Condition
Inspect roll profiles and chuck surfaces regularly. Worn tooling gradually changes seam geometry and can cause dimensional drift.
2. Control Hook and Overlap Dimensions
Verify body hook, cover hook, seam thickness, and overlap against OEM specifications during machine setup and routine inspections.
3. Balance Lifter Pressure
Too little lifter pressure can cause slippage or deadhead conditions. Excessive pressure may lead to buckling or sprung seams.
4. Ensure Material Consistency
Incoming can bodies and ends must meet alloy and thickness specifications. Any material change should trigger seam recalibration.
5. Maintain Clean Seaming Environment
Remove product splash, oil, or debris from the flange area before seaming to avoid contamination inside the seam structure.
6. Standardize Changeover Procedures
All critical machine parameters should be documented and verified during SKU or format transitions.
Conclusion
Double seam defects represent structural failures in the most critical part of a metal can package — the hermetic seal.
Although defects vary in appearance, most originate from mechanical wear, inconsistent materials, or improper machine setup.
Because beverage cans often operate under internal pressure and long distribution cycles, even minor seam deviations can escalate into leakage, spoilage, or costly recalls.
By maintaining tooling precision, controlling seam dimensions, and enforcing disciplined process management, manufacturers can significantly reduce double seam defects and ensure long-term product safety.
FAQ
A: Hook lengths should meet OEM specs, typically 0.070-0.080 inches for body and cover to ensure overlap. Deviations below this reduce seal integrity and increase leak risks during pressure testing.
A: Use non-destructive methods like seam scope imaging or pressure testing. For procurement, require suppliers to provide batch teardown reports to verify interlocking.
A: Vee defects stem from uneven pressure or damaged tooling, leading to overlap loss. Engineers should align rolls precisely, and procurement teams should source high-precision tooling to minimize this.
A: Harder materials resist tucking, causing short hooks and reduced overlap. Verify alloy specs on incoming materials and recalibrate seaming pressure for compatibility.
A: Seam bumps create stress points that fail under thermal or pressure loads, risking leaks. During acceptance, measure thickness variations and reject batches exceeding 0.004 inches.
A: Set pressure to avoid slipping or buckling, typically 50-70 psi based on can size. Test with trial runs and document settings for consistent production.
A: Worn rolls show hardness loss or profile changes, leading to fractures. Inspect surfaces weekly and replace before 10% dimensional drift to maintain seam integrity.
